I’ve never been prone to sunburns, but my husband actually is. Anytime we go to the beach or spend a significant amount of time outdoors he’s careful to apply sunscreen.
I actually think he may be more concerned about the wrinkles and aging that sun damage can bring!
I totally get it.
But we went to the beach earlier this summer and he got burned! A little too much fun in the sun without reapplying can do that. We had a great time, but his back and shoulders were completely red – so much so that I affectionately called him “my little lobster” for part of the day.
Right when we got back to the house we were renting, I knew that we needed to act quickly to reduce the inflammation.
Thankfully, I packed some homemade body butter and by adding essential oils it turned out to be the perfect remedy for his sunburn.
We applied the homemade body butter and essential oil multiple times on the day that he got burned (probably 4 times). By the next day, I couldn’t call him “my little lobster” anymore because the bright red skin had faded to pink.
And you know what else was miraculous? He didn’t peel at all.
Not the second day, not ever. By the third day his skin was still a little pink but it was almost back to normal.
I credit the miraculous abilities of essential oils and the simple ingredients used in this homemade body butter.
Here’s some of the skin healing ingredients in the homemade body butter:
- Almond Oil is rich in Vitamin E which is nourishing to the skin and helps to soothe. It’s also good for dry, dehydrated skin.
- Coconut Oil is wonderful for all types of skin issues. It’s anti-inflammatory which makes it very useful for sunburns.
- Shea Butter soothes damaged skin and also acts as a sealant to lock in moisture.
Now, for the essential oils. These little drops can work miracles. Here’s the essential oils that we use to promote healing from sunburns:
- Frankincense supports skin cell regeneration. This is exactly what you need when you’re trying to repair damaged skin and it’s also why Frankincense is one of the top anti-aging essential oils.
- Lavender is a very complex essential oil and one of its many uses is for soothing skin irritations. It also doesn’t hurt that it has a lovely aroma.
- Sandalwood helps to hydrate the skin and lock in moisture. This woody essential oil has a beautiful, earthy aroma and is one of my favorites for dry skin.
- Myrrh is another essential oil with many benefits. It’s used in anti-aging and skin care treatments and we use it in this burn cream as well. It helps to calm the skin and promote healing.
These are ROCKSTAR ingredients. When you use the homemade body butter you’ll see why you’ll have no need to ever throw money away on conventional lotions or body butter again.
The essential oils are just icing on the cake and they are especially useful for healing a sunburn. This is a staple toiletry that we use regularly in our household. Give it one try and you will too!
Print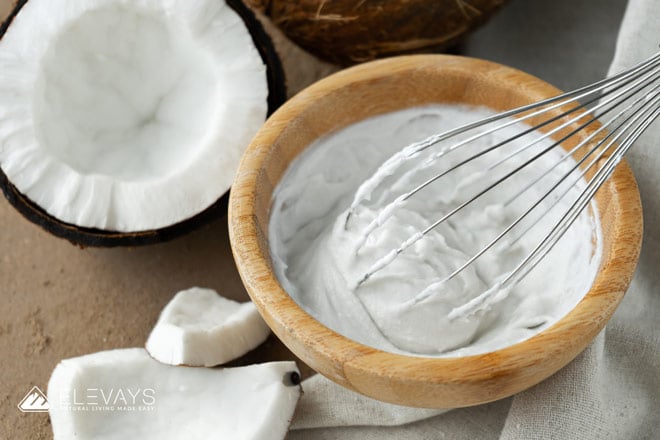
Whipped Body Butter
Description
Standing Mixer or Handheld Mixer
Ingredients
- 1 cup of shea butter (I use Everyday Shea – unscentend)
- ½ cup of coconut oil
- ½ cup almond oil
- Essential oils (Frankincense, Lavender, Sandalwood, Myrrh)
Instructions
- Gently melt the shea butter and coconut oil over very low heat. Some say to use a double broiler, but I’ve had success just making sure that the heat is very low. I add the shea butter to the pot first and once it’s pretty melted, I add the coconut oil. The reason for this is because the shea butter takes longer to melt than the coconut oil.
- Remove from heat and stir in the almond oil.
- Transfer to a large mixing bowl and place in the refrigerator. You’ll need to chill the oils until they are solidified but still soft to the touch. You should be able to press your finger into the oil and it leaves an indentation.I wish I could say exactly how long it takes to get to this point, but it really depends on your refrigerator and how cold it is. It typically takes my refrigerator 1 ½ to 2 hours to get the right consistency. Check out the video to see exactly what to look for so you know when your body butter is ready to be whipped.
- Once it’s chilled, using a handheld mixer or KitchenAid, whip the mixture until it’s a thick and fluffy consistency – like smooth creamy butter. Transfer to a clean jar and seal.
- To use as a sunburn cream – add 1 drop each essential oil to the palm of one hand. Using your index finger, scoop a dallop of body butter into the same palm holding the essential oils. Combine by gently rubbing your palms together. Apply to the sunburned areas using more essential oil and body butter as needed. Apply 3 to 4 times during the day the first 2 to 3 days after a burn and then 1 to 2 times a day after that.
Notes
Some may wonder why we don’t add the essential oil to the homemade body butter as it’s being whipped. This is definitely an option.
However, I prefer to add the oils at each use when we’re aiming for a therapeutic result. The reason for this is that it’s hard to find amber or cobalt blue jars that are widemouth which is good for homemade body butter.
The color of the jars is important because essential oils are light sensitive and they lose potency over time when exposed to light. Secondly, for therapeutic benefits I typically prefer to use the oils straight out of the bottle to ensure that they are still as potent and effective as possible.
I also like the flexibility of leaving the body butter unscented. By doing that, I can add essential oils at each application based on the aroma that I want or the therapeutic benefit I’m going for.
It’s up to you though. Just make this homemade body butter recipe as soon as you can, because once you do you’ll wonder how ever lived without it!


Do you keep it in the refrigerator or at room temp.??
Hi Jenny! You can keep it in the fridge or at room temp if it’s cool. If it’s warmer, it tends to be more on the liquidy side. Hope this helps!