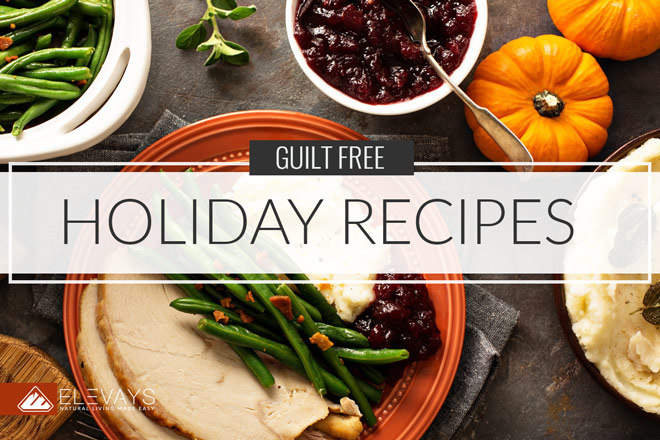
A Word from Erica…
Years ago (back in 2010) I was living in downtown Toronto during the holiday season. Isaac and I had just gotten married and our world was full of excitement. We didn’t have much money back then and we were just getting our consulting business started. So, traveling back home to the States for Thanksgiving and Christmas was out of the question.
That meant I needed to stay in Canada for an American Thanksgiving (though I did get to celebrate Canadian Thanksgiving which was awesome!). I wasn’t just going to let that day come and go without some fanfare. Even though the Canadians at large weren’t celebrating we (me and Isaac) were going to celebrate.
So, we invited some friends over to our (super small, but very posh) downtown apartment and I contemplated what to make. As I thought about the options of things I could serve, I was flooded with great memories of times that I had celebrated Thanksgiving with my family. All of those memories were enhanced by the food I got to experience. The aromas….the taste….the anticipation of Thanksgiving dinner.
And instantly, I knew what to make: Roasted Turkey (of course), cornbread type stuffing (my mom always made this), collard greens with vinegar and tomatoes (it’s a Southern thing), green bean casserole and sweet potato pie. Isaac helped me make the meal, we invited our friends over and it was almost exactly like traditional Thanksgiving at home.
Food has powerful anchors. It’s probably one of the reasons why we often struggle to eat well when we’re emotional or why it’s so hard to give up the (unhealthy) foods that we grew accustomed to eating as children. If you’re someone that’s new to healthy living and you’re wondering how to navigate the holidays without going off the rails, there’s something I’d like you to consider.
Instead of feeling bad about the desire to overindulge or choose foods that are not ideal for you, I invite you to explore a new way to enjoy the foods that you’ve always loved. There are tons of recipes available online and there’s a small selection here from The Elevays Team of our favorite holiday recipes.
If you’re already living the healthy lifestyle, we hope that our recipes give you additional options. We know it can be a challenge to stay the course during the holiday season. If we can make it a little bit easier for you, then that’s even better. 🙂 Enjoy these awesome recipes from me and The Elevays Team.
Recipes from Natalie
Thanksgiving has become one of my favorite holidays. I have a huge family which I love spending time with but since my husband and I have moved to Colorado it has become our own special day where just “our family” gets to spend the day together… getting good quality time with just me, my husband Jim and son Leonardo. My husband was a professional chef for a long time, and we both worked for Whole Foods for many years so we love the best of the best when it comes to food. So this is the day we go all out! My husband makes the best turkey I have ever had (not just saying this)…. He has perfected it over the years and it is absolutely delicious!
Side note: This recipe takes 48 hours to make as you brine your turkey for 24 hours in advance to cooking it.
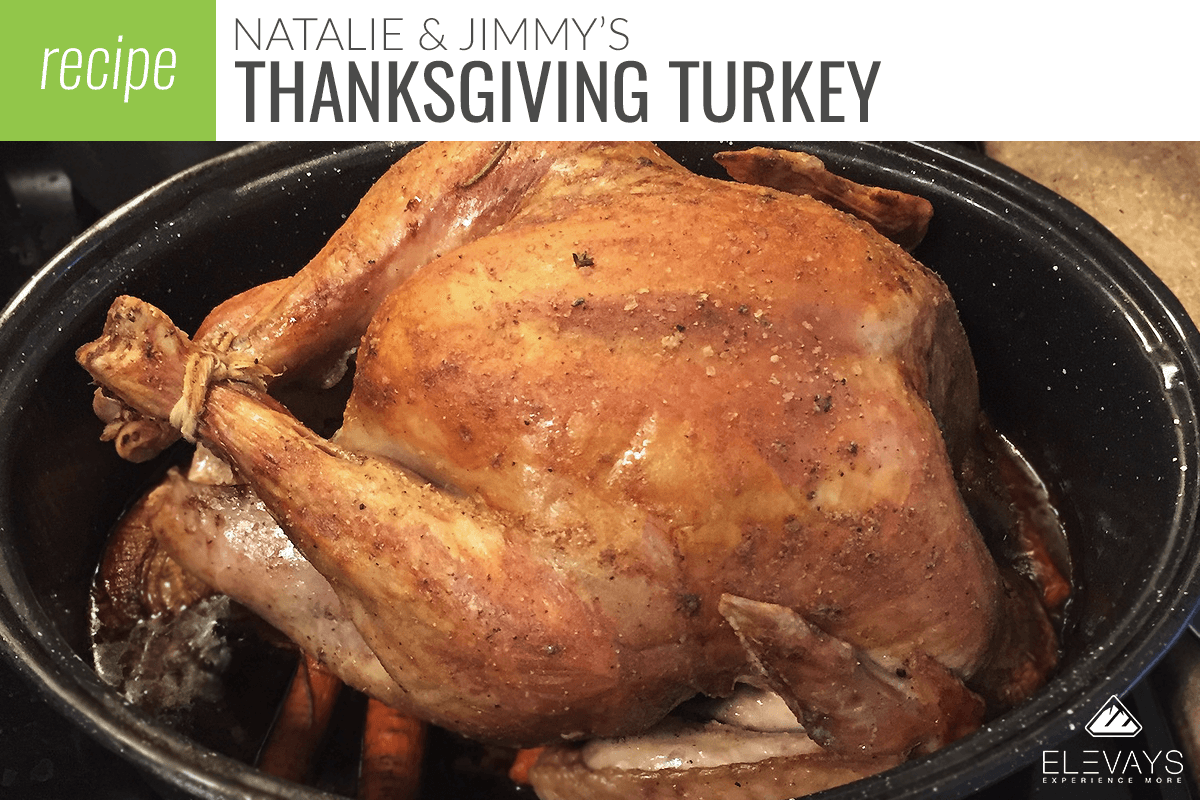

Natalie & Jimmy’s Thanksgiving Turkey
Ingredients
- Whole Turkey or Turkey Breast
- Whole Carrots (get one bag as you will use quite a few depending on the size of the turkey)
- 1 stalk of celery
- 3 yellow or sweet onions
- 1 large tbs fresh sage
- 1 large tbs fresh thyme
- 1 tbs fresh rosemary
- Turkey Stock
- Extra Virgin Olive Oil
- 1 pad of butter
- 1 apple (Fuji or Honeycrisp is best)
- Sea Salt
- Garlic (about 2-3 cloves depending on the size of your turkey)
- Pepper
- Lemon Juice
Instructions
- Take your turkey and submerge into a pot of water with a heavy helping of salt and lemon juice. Make sure the turkey is completely covered in this water. Keep in the refrigerator (this is going to make your turkey the juiciest you have ever had! It is well worth the extra day of prep work).
- Remove the turkey from the water, and drain over the sink. Pat dry with a paper towel. Set aside (this is extremely important because if your turkey is not dry the rub will not stick).
- Preheat oven to the broiler.
- Take a deep set roasting pan and set aside.
- Take two onions, cut in half, remove the peel and set aside.
- Take out your whole carrots, rinse them off, and cut off the ends (no need to peel them as you will not be eating them, they are just for flavor).
- Clean and trim your celery, leaving them whole.
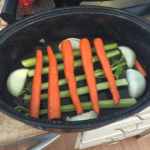
- In the deep set roasting pan… make a grid base with the carrots and celery (see picture) and put the onion halves around the grid. This is what your Turkey will roast on.

- Take a few extra carrots and, celery sticks and cut them in half. Set aside.
- Take your apple and cut into large chunks and set aside.
- Take your last onion, cut in half, remove the peel, and cut into quarters.
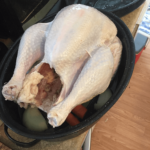
- Take your turkey and salt the inside cavity. Then stuff with the apples, onions, carrots and celery until packed tight with the veggies and apples.
- Place turkey right side up on top of the veggie grid and onions into the roasting pan, and set aside.
- Take the fresh thyme, sage, and rosemary and rough chop together, set aside.TIP: you can go a little heavy on the herbs if you like them but make sure that you do not go heavy on the rosemary as it is the most powerful one and will over power the dish if you use too much. No more than 1 tbs of rosemary.
- Peel your garlic cloves, smash with the back side of the knife and chop until fine.
- Mix the garlic with the fresh herbs into a bowl with your olive oil and the pad of butter making a thinner paste.
- Take this mixture and massage it onto the turkey, covering it everywhere. Do not miss one little spot!
- Add turkey stock (you can use veggie if you cannot find turkey) to the pan. Add enough where it covers the entire bottom of the pan.
- Your boiler should be ready in your oven… put your turkey in and cook for about 5-10 minutes… you want to keep a close eye on this. Once your turkey starts to brown on the top then you immediately turn your broiler off and turn your oven to 350 F.
- Cook your turkey for 14 minutes for every pound (so this varies depending on the size).
- Make sure to keep an eye out toward the end… if it looks as if it’s getting too brown then cover it with foil, and also check the temp right then to make sure it’s not over cooked. The perfect temperature for a turkey is 165 F.
- Once done cooking remove immediately from the oven and cover with foil as fast as possible. Let it sit covered tightly for at least 25 minutes. It must rest covered or it will become very dry.
- Once it is set… you can remove the foil, carve and serve.
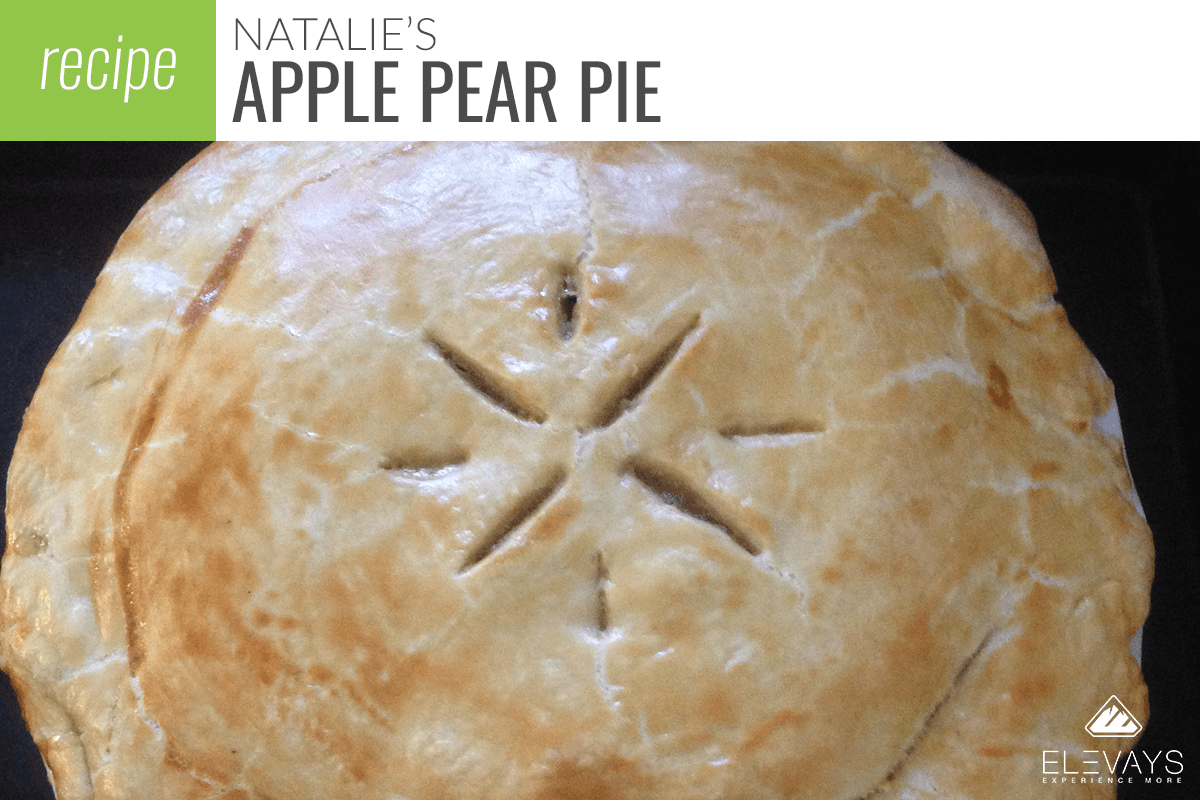
Natalie’s Apple Pear Pie
I personally love to bake. I am a 2nd generation Italian American and grew up in a house with Mom, Dad, Grandma, Grandpa, Great Grandma and Uncle. My Grandmothers taught me so many amazing things about cooking and how “Food is Family” in our culture, but baking has always been my favorite. There is something about the peacefulness of it, and the memories that I will always cherish when I start different recipes. It’s like transporting back in time to my childhood with my Grandmothers in the kitchen.
My favorite holiday recipe that we used to make was an apple pear pie. I still honor them every year by making this for my family. It’s the perfect combo of fruit as it is not too sweet but just sweet enough. The combination is magic in your mouth! I have altered it just a little bit to make it on the healthier side, using alternative flours and sugars. Thanksgiving is the best time for this since pears and apples are at the peak of their season. My family looks forward to this every year for the end of a perfect Thanksgiving meal!
Side note: I recommend making this one day ahead, as it takes a while to bake and then it needs to set for at least an hour. If you make it the same day, please make sure it’s one of the first things you make.

Natalie’s Apple Pear Pie
Ingredients
Crust Ingredients:
- 1 egg lightly beaten (for basting of the pie crust after assembly)
- 1 tbs of fresh apple cider (for basting of the pie crust after assembly)
- 1 cup cold butter cut into cubes
- 2 ½ cups of almond flour
- 1 tsp salt
- 1 tsp coconut sugar
- 3–6 tbs ice cold water
Apple Pear Pie Ingredients:
- ½ stick butter melted (plus ¼ stick butter melted)
- 1 tsp cinnamon
- ½ cup brown sugar (plus a little extra for pre-baking the apples)
- ½ cup coconut sugar (plus a little extra for pre-baking the apples)
- ½ tsp salt
- 6 tbs almond flour
- 8 cups of peeled and thinly sliced apples (half Honeycrips or Fuji and half Granny Smith is the best combo)
- 4 cups of peeled and thinly sliced pears (half Bartlett and half Bosc is the best combo)
Instructions
Instructions for Pie Crust:
- In food processor combine flour, salt, sugar and mix until combined.
- Scatter butter pieces over the flour and mix with pulses (can also use a pastry cutter or your hands)
- The crust consistency should have bits no larger than the size of peas.
- Put crust into the bowl, and sprinkle the water over the mixture. Fold in using a spatula.
- Press down on the dough kneading until it starts to stick together.
- Add up to two more tbs water if needed.
- Flour your surface and rolling pin.
- Divide dough into two balls and flatten each until about a 4th inch thick.
- Wrap separately and put into fridge for at least an hour.
- When ready to make the pie, again flour your surface and rolling pin.
- Roll out each dough ball evenly to fit your pie plate.
Instructions for Pie:
- Preheat oven to 475 F.
- Combine 1/2 stick melted butter, cinnamon, and coat the apples and pears with them tossing gently in a bowl without breaking the apples and pears. Make sure they are all coated on each side of each slice.
- Evenly spread out coated apples and pears onto a baking sheet lined with parchment paper or foil, and sprinkle evenly with a little brown sugar and coconut sugar. (just a pinch)
- Bake for 7-10 minutes, turning the slices one time half way through. (Make sure you bake until edges are browning and the juices are bubbly).
- Cool in the pan and reduce the oven heat to 350 F.
- Line the pie plate (use a deep set pie plate) with the first pie crust.
- In a bowl combine brown sugar, coconut sugar, salt and almond flour.
- Add cooked apples and pears with all of the juices from the pan, and slowly mix carefully without breaking the apples and pears. Make sure everything is coated evenly.
- Put apples and pears into the pie crust and drizzle that 1/4 stick of melted butter over everything in the pie.
- Then sprinkle just a little more cinnamon over the top.
- Put the 2nd pie crust over pinching the edges together, so they are sealed.
- Make a few slits in the center of the pie crust, so that when it bakes it can evaporate some of the liquid out, so you do not have a runny pie. I like to make a cute design to make it look fancy.
- Take your beaten egg and 1 tbs of freshly squeezed apple cider and mix together. Take this mixture and brush the top of your pie crust covering the entire thing.
- Cover the pie with foil (not super tight because you do not want the crust to touch the foil) this just prevents from any burning. Put onto a baking sheet and bake for 40 minutes.
- Take the foil off after 40 minutes but keep the edges covered (you can do this with foil or they make a piece for this that looks like a metal ring for specifically for pies) and then bake for an additional 30 minutes or so until the crust is golden brown.
- Take out of the oven and let cool completely before cutting into it or it will leak. It needs to set for at least an hour and even longer is ok. It doesn’t need to be refrigerated once baked, you can just keep it covered and on the counter.
- It is best served warm. Which you can do in the oven at a low temperature once the pie has already set.
Recipes from Stephanie
Hi there! I’m Stephanie! Ten years ago I was diagnosed with two autoimmune diseases (Celiac and Hashimotos) and it changed the way I had to eat.
I am a total foodie, I literally plan vacations with my husband around the restaurants I want to eat at!
The holidays hold some of my favorite meals. I struggled for years to find recipes that were reminiscent of my favorite foods my grandma would make for us during Thanksgiving and Christmas. If you’re on the paleo or autoimmune protocol diet, you know the struggle to find compliant foods that still taste like the real deal!
After a lot of trial and error, I was able to recreate some of grandma’s staples using ingredients that fit the paleo and autoimmune protocol diets.
Here are my recipes for a AIP stuffing, AIP cranberry sauce and an AIP single serving apple crumble that would make my grandma proud! Enjoy!
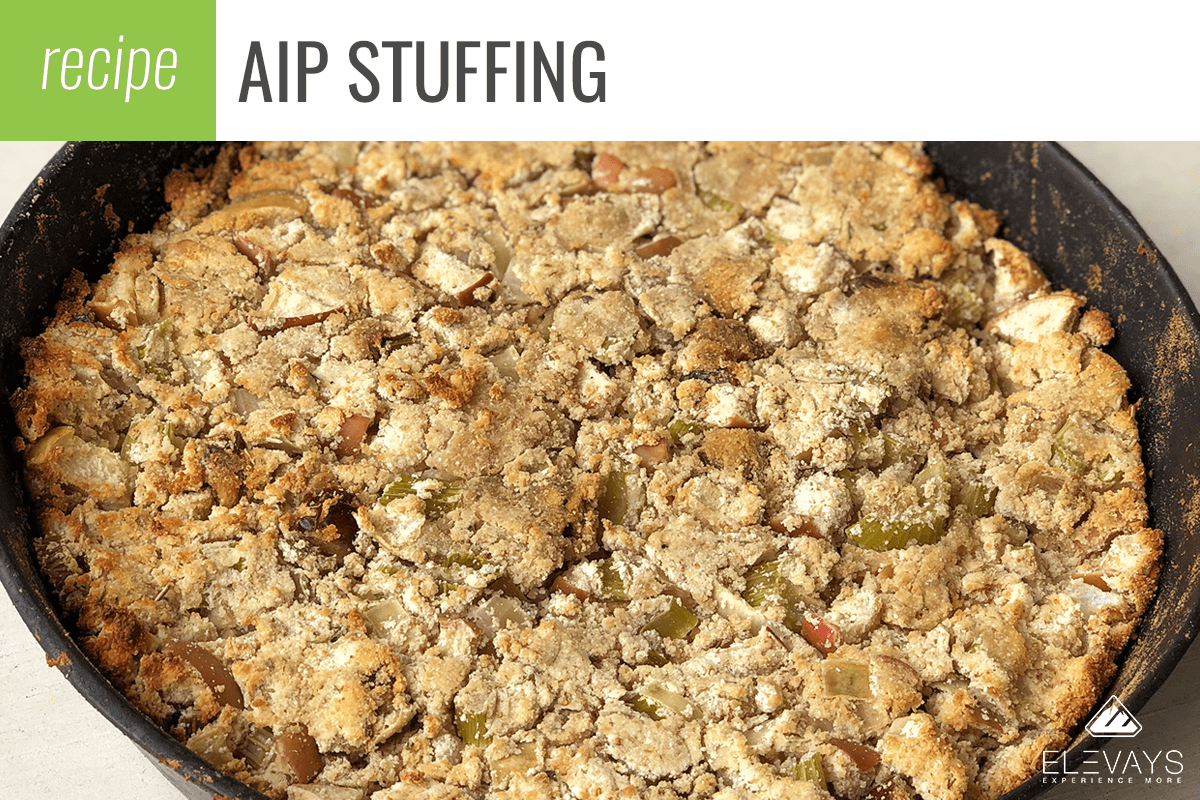
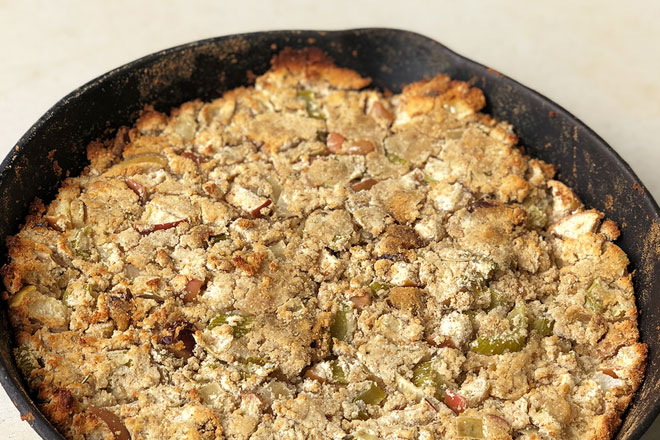
AIP STUFFING
Ingredients
- 2 cups organic celery (diced)
- 2 cups organic onion (diced)
- 2 cups organic fuji apples (cored and diced)
- ½ cup organic dates (chopped)
- 1 cup organic coconut flour
- 1 cup tigernut flour
- 1 tsp sage
- 1 tsp thyme
- ½ tsp rosemary
- ½ tsp salt
- ⅔ cup chicken or beef bone broth (homemade or store bought with no added natural “flavors” or nightshades to make AIP compliant)
- 2 tbs coconut oil
- 3 gelatin eggs*
- *gelatin egg recipe below
Instructions
- Preheat oven to 350 degrees
- Use coconut oil or avocado oil to grease a medium size baking dish (I love to make this in a cast iron skillet too to go from stovetop to oven easily instead of a baking dish. Just make sure your cast iron skillet is large in size)
- Add 2 tablespoons of coconut oil to skillet and melt over medium heat
- Add diced celery, onion and apples along with salt and herb seasonings to skillet and stir and cook for 5 minutes. Remove from heat.
- Mix coconut flour, tigernut flour and chopped dates in a separate bowl and mix well until everything is combined. Add to celery, onion and apple mixture and toss to coat well.
- Add chicken or beef bone broth and stir to combine (mixture will be wet and slightly crumbly still)
- Make gelatin eggs (recipe below). Add gelatin eggs and mix well again. Transfer to baking dish if using instead of cast iron skillet. Smooth top of the mixture until even in the baking dish or skillet.
- Transfer to oven for 45-60 minutes until a golden brown.
- Remove from oven and let cool. Enjoy!
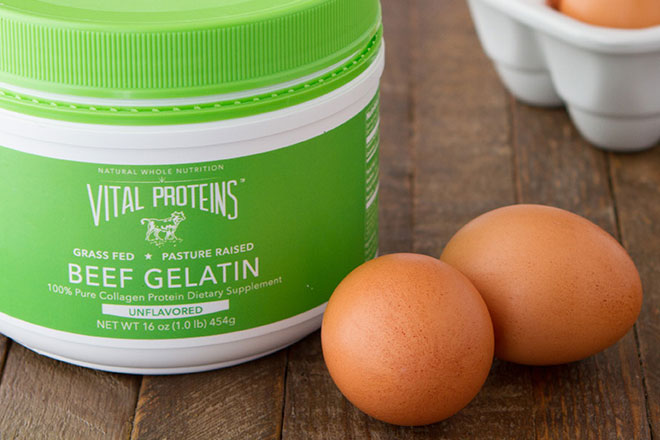
GELATIN EGG RECIPE
Ingredients
- 3 tablespoons Vital Proteins gelatin (green container)
- 3 tablespoons luke-warm water
- 6 tablespoons boiling water
Instructions
- Add 3 tablespoons of gelatin to a glass bowl
- Add 3 tablespoons of luke-warm water and stir to get gelatin wet (it will clump which is totally fine for this step)
- Add 6 tablespoons of boiling hot water (this is crucial!) and whisk, whisk, whisk with a fork to get out all the clumps. I immediately pour into the stuffing mixture so I can stir and combine it well into the stuffing while it is still very fluid.
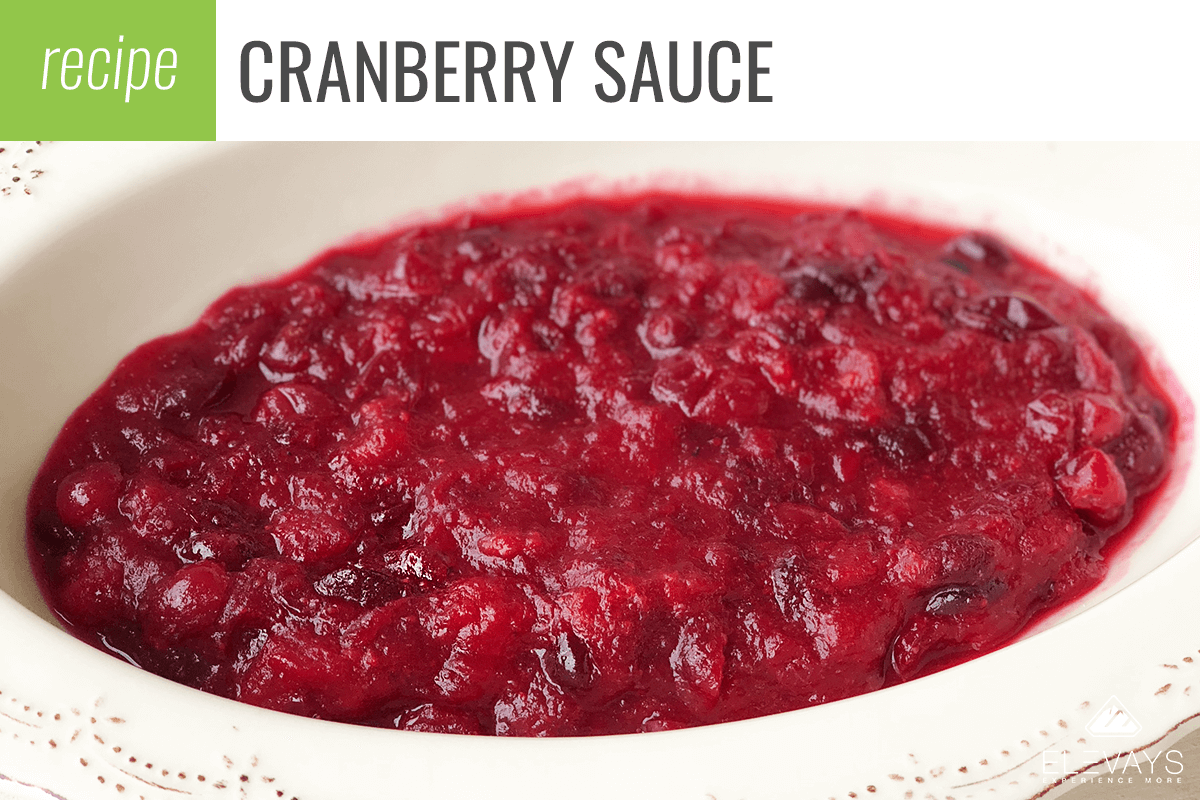
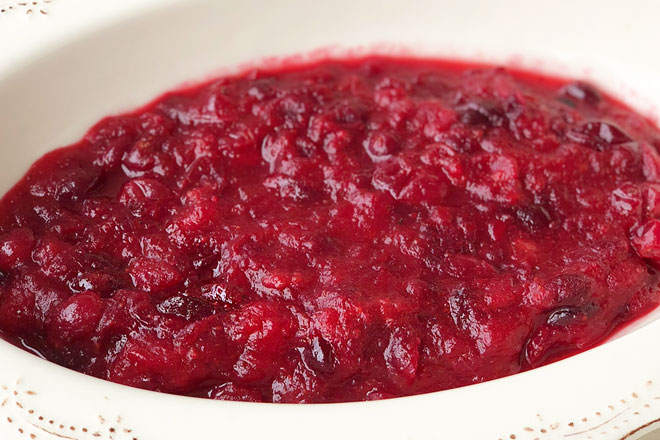
CRANBERRY SAUCE
Ingredients
- 12 oz organic cranberries
- ¾ cup organic orange juice
- ½ cup of honey (maple syrup or coconut sugar)
Optional
- Pinch of cinnamon or nutmeg
- Zest of an orange
Instructions
- Place cranberries, orange juice and sweetener of choice (honey, maple syrup or coconut sugar etc) into a saucepan over medium heat on the stove top.
- Allow to come to a simmer. Stir frequently for 10-15 mins. The berries will begin to pop and the sauce will thicken. Keep stirring to prevent your sweetener from burning.
- Remove from heat and transfer to serving bowl or storage of choice. Once completely cooled you may refrigerate or serve.
Notes
Optional: After removing from heat you can add your cinnamon, nutmeg or orange zest.
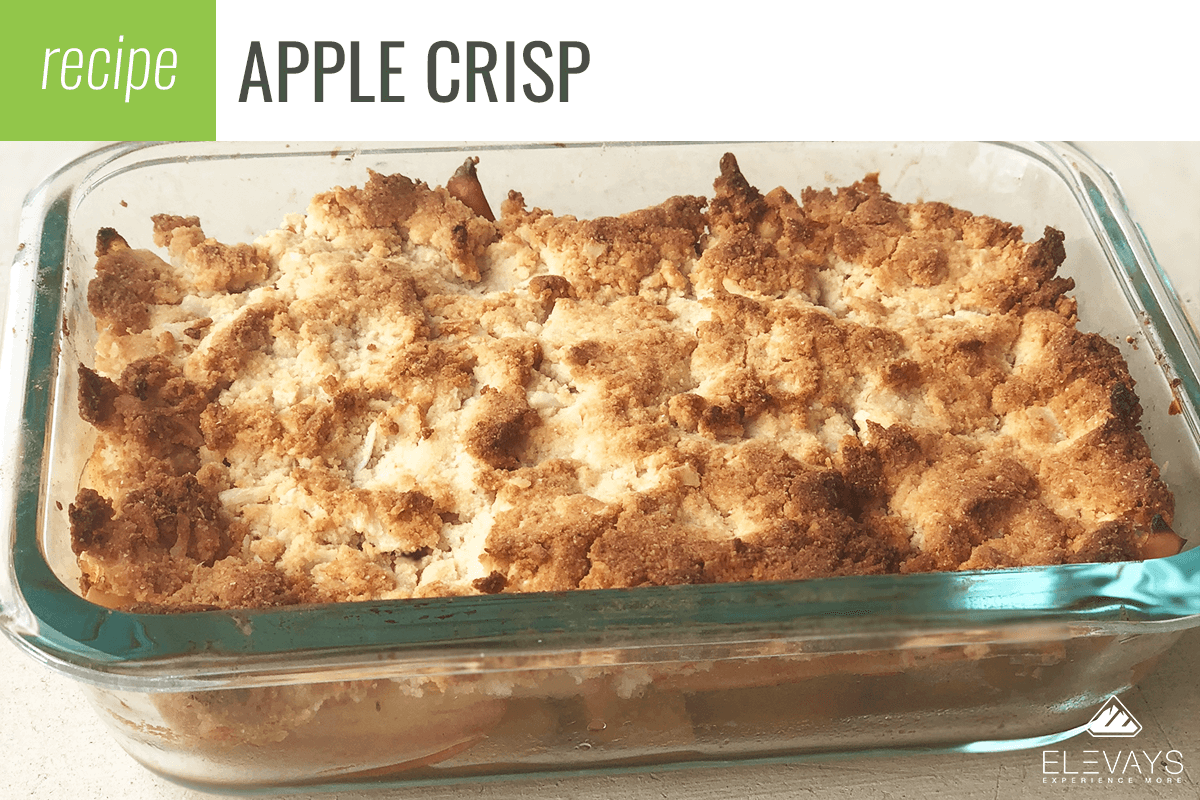
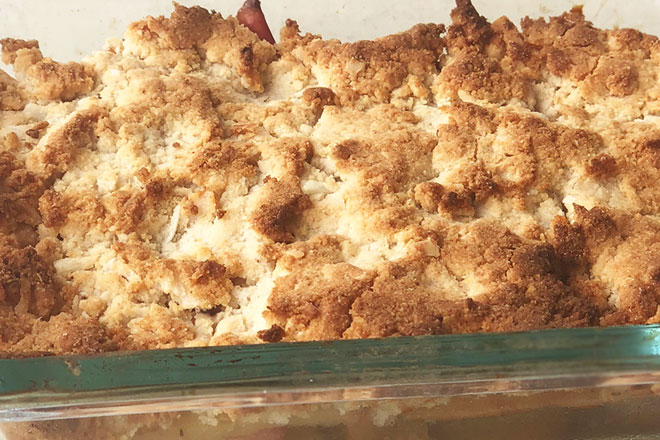
APPLE CRISP
- Yield: 1 1x
Description
*single serving, perfect for bringing to a holiday dinner so you can enjoy an AIP compliant dessert, double or triple recipe for bigger portion
Ingredients
FILLING
- 1 large organic apple (honeycrisp or fuji are my favorite, cored and sliced into thin slivers)
- 1 tbs organic maple syrup
- 1 tsp of organic lemon juice
- ½ tsp ground cinnamon
TOPPING
- ¼ cup coconut flour
- 2 tbs tigernut flour
- 2 tbs cassava flour
- ¼ cup unsweetened shredded coconut flakes
- ⅛ tsp salt
- 1 tbs maple syrup
- 2 tbs organic palm shortening
- 1 tbs coconut oil (not melted)
Instructions
- Preheat oven to 400 degrees.
- Grease a baking dish with coconut oil.
- In baking dish, combine thinly sliced apples, maple syrup, lemon juice and cinnamon and toss to coat and combine.
- In a separate bowl, mix coconut flour, tigernut flour, cassava flour, unsweetened shredded coconut flakes and salt until well combined.
- Add maple syrup. Stir. Mixture will be clumpy still. Then add palm shortening and coconut oil (not melted) and smash to combine with a fork or with fingers (fingers works best although much messier!)
- Crumble topping mixture on top of apples until well covered.
- Place in oven for 15 mins until golden brown.
Recipes from Sherri
I grew up in a big family, with big appetites and big hearts. So Thanksgiving for me is all about spending precious time with family and unapologetically eating our way into a Thanksgiving food coma 🙂
Both my grandmother and my mother LOVE to cook ( that’s definitely where I get my passion for cooking from) so there was always an over abundance of food. Our home would be brimming over with the smells of apple cider, cinnamon buttered baked yams, green bean casserole, homemade braided breads and of course, the all important roasted turkey. As a kid, it was next to impossible to not attempt to sneak into the kitchen and grab a random bite of food while waiting for the feast to be ready. Everything smelled SO delicious and I want to bring some of that experience to your Thanksgiving table this year. These sage roasted turkey legs are full of holiday flavor and are perfect if you have a big family and need some extra turkey or if you have a smaller family and don’t need to roast an entire bird.
For those with autoimmune disease, bringing your own sage roasted turkey legs to your family feast is a great way to participate in the holiday meal without getting sick! I have Celiac Disease and Hashimoto’s, so I know how difficult this can be. Preparing these turkey legs beforehand and bringing them with you will definitely help you feel a little more normal at big family meals. My recipe for cinnamon buttered baked yams (featured on this page) is also a gluten free recipe that you can make beforehand and bring with you. Definitely check it out as the turkey legs and yams together make a beautiful and easy to travel with meal!
I sincerely hope you enjoy this recipe as much as I do and have an absolutely wonderful and delicious Thanksgiving!
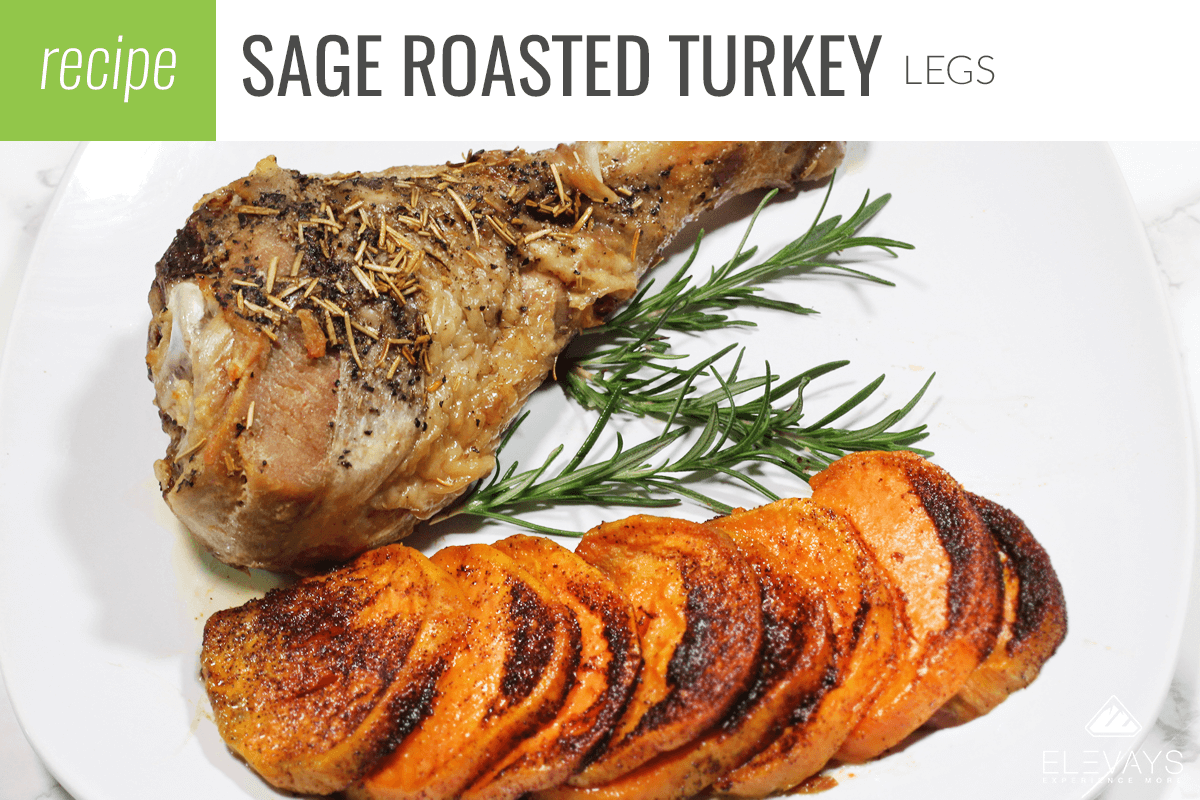
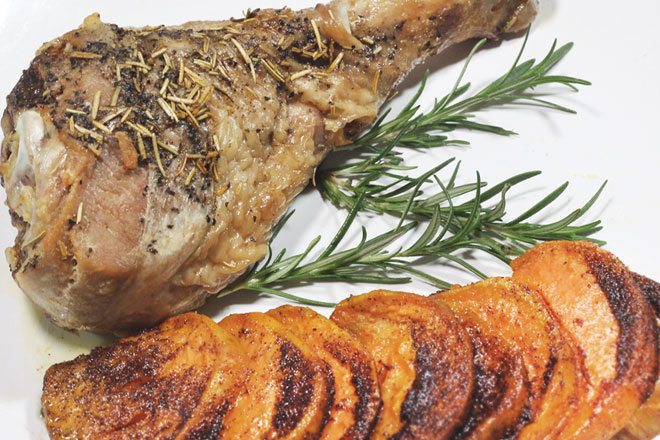
Sage Roasted Turkey Legs
- Yield: 2 1x
Description
*For those who follow strict AIP, you can substitute the butter with 2 tbs coconut oil (use this brand as it’s organic, made in a gluten free facility and expeller pressed so your turkey won’t taste like coconut) and 2 tbs extra virgin olive oil.
Ingredients
- 2 turkey legs
- 3 tbs crushed rosemary
- ¼ cup grassfed butter or ghee
- ½ tsp ground sage
- 1 tsp garlic powder
- ½ tsp black pepper
- 2 tsp sea salt
Instructions
- Preheat oven to 375*.
- Place legs into a roasting dish.
- Take a small pot and melt your butter on low. Baste your turkey legs with the melted butter, both under and on top of the skin.
- Combine your sage, garlic powder, salt & pepper in a bowl. Rub this mixture onto the turkey legs (again both under and on top of the skin).
- Cover your roasting dish with lid or foil & bake for 20 minutes.
- Open the oven & baste turkey legs with butter from the pan (you can melt more butter to add if so desired). Put the turkey legs back into the oven and bake for another 10 minutes.
- Remove turkey legs and sprinkle on rosemary (if you add this too soon it will burn).
- Put turkey legs back into the oven without the lid or foil and bake for another 15-30 minutes or until internal temperature reaches 165*.
Note: This process may take longer if your turkey legs are large. If you have to bake for a longer period of time due to the size of your turkey legs, remember to baste your legs every 15 minutes to keep them from drying out.
- Remove turkey legs from oven, cover roasting pan with foil (this helps keeps the meat from drying out) and let cool for 10 minutes. Serve and enjoy!
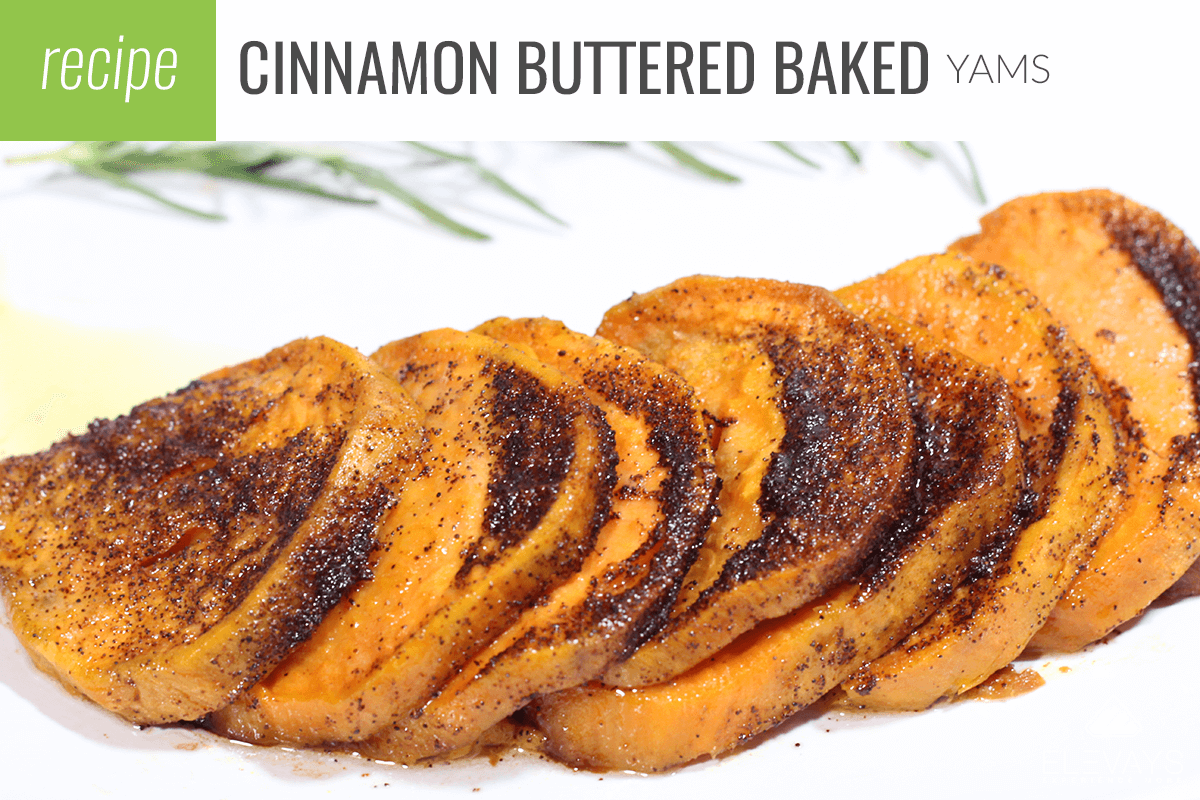
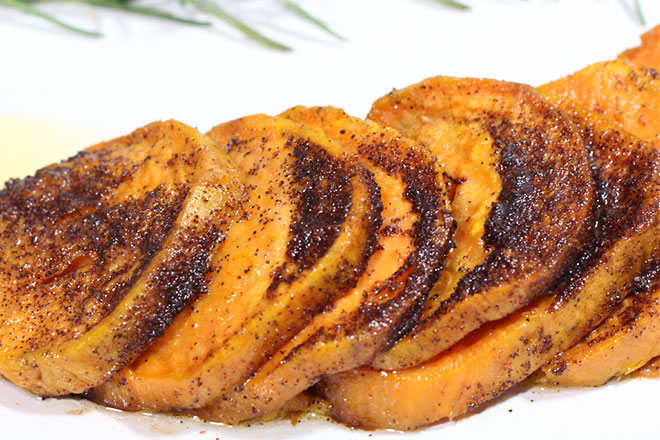
Cinnamon Buttered Baked Yams
Every holiday season, there was one dish that everyone always wanted more of and it never lasted for longer than 5 minutes before it was entirely devoured. It wasn’t the brussel sprouts (sorry grandma). I personally have nothing against brussel sprouts, but they cannot compete with cinnamon buttered baked yams. They are the stuff that dreams are made of and the single dish that absolutely MUST make it to our Thanksgiving table other than the turkey of course.
The wonderful thing is after I was diagnosed with Celiac Disease as an adult, this is not a holiday recipe I had to give up. It’s also so simple and easy to travel with, making it perfect for anyone with Celiac Disease needing to bring their own food to a holiday meal.
So go ahead, dig into this incredibly simple and easy to make recipe and make everyone at your table super impressed and happy too.
Quick note: If you’re making these for a big family, I suggest cutting the sweet potatoes into cubes instead of slicing them into rounds, as you can make more in the same sized dish and it will cook more evenly (and cook faster…. because if your family gatherings are anything like mine, people will be asking if it’s done yet every 2 seconds).
Cinnamon Buttered Baked Yams
- Yield: 4 -6 1x
Description
*For those who follow strict AIP, you can substitute the butter with 4 tbs coconut oil (use this brand as it’s organic, made in a gluten free facility and expeller pressed so your yams won’t taste like coconut), 4 tbs extra virgin olive oil and 1/2 tsp sea salt.
Ingredients
- 4–5 medium sized sweet potatoes
- 2 tsp cinnamon
- ½ tsp ground nutmeg
- ¼ tsp ground clove
- 8 tablespoons or 1 stick of grassfed butter (or ghee)
- Sea salt
Optional:
- ¼ cup raw honey ( if you want to make them sweeter like candied yams)
Instructions
- Preheat the oven to 350*.
- Wash and peel the sweet potatoes.
- Chop the sweet potatoes into ½ inch rounds.
- Put the sweet potatoes into a 9 x 13 baking dish.
- Grab a small pot and melt the butter on low.
- Add the cinnamon, nutmeg, clove and optional honey to the pot with the butter and mix together.
- Pour the mixture over the sweet potatoes doing your best to evenly coat them.
- Place a lid over your baking dish or foil (just make sure it’s sealed so the steam stays inside the dish).
- Bake the sweet potatoes for 30 minutes.
- Remove the sweet potatoes and baste with the butter and spice mixture from the pan (this keeps everything from drying out too much).
- Cover the sweet potatoes and bake for another 15 – 20 minutes until fork tender.
- Remove the sweet potatoes and let cool for about 10 minutes.
- Sprinkle with additional cinnamon and a pinch of sea salt and serve.
Recipes from Erica
This is the best stuffing…ever. Depending on the number of people it may be very wise to double the recipe. It’s that good. People will be coming back for more and no matter how much you make there probably won’t be any leftovers.
This recipe is one that I initially found on Food Network but I adapted it to suit our lifestyle and this stuffing just doesn’t miss a beat. It’s amazing! Do yourself a favor and make it this Thanksgiving. 🙂
For a more savory stuffing, stick with a corn muffin recipe that isn’t super sweet. I have a recipe below that works well if you’re interested.
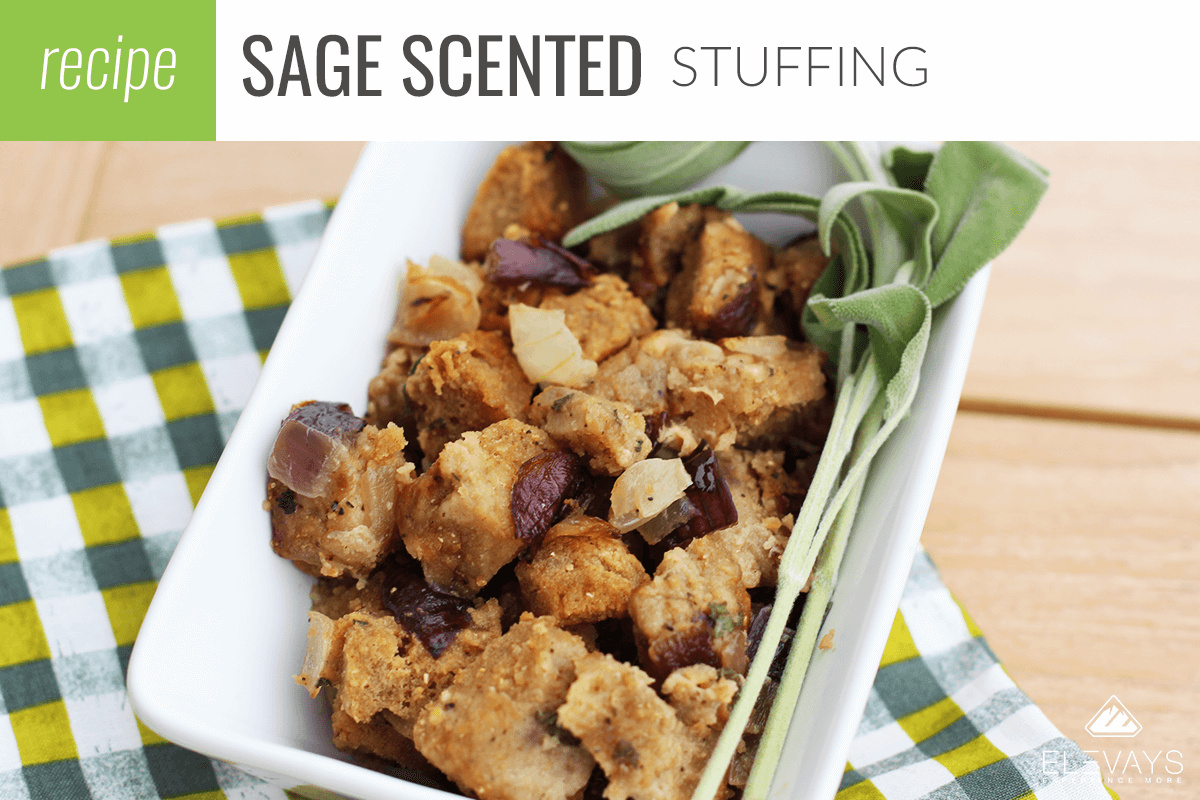
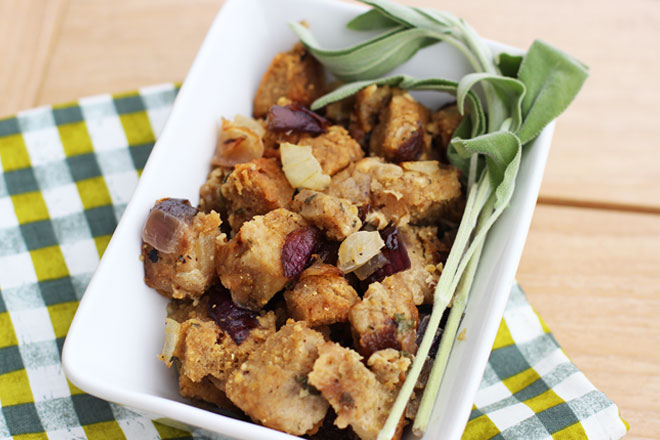
Sage Scented Caramelized Onion Stuffing
- Yield: 6 1x
Ingredients
- 2 tbsp. butter or coconut oil
- 2 onions (chopped (I use a red and a white))
- 12 small cornmeal muffins or 6 large cornmeal muffins (see below for recipe, cubed)
- Small handful of fresh sage (chopped well)
- 1 egg
- ¼ cup of coconut milk
- ¼ chicken broth (homemade is best if you have it)
- Salt and pepper to taste
Instructions
- Preheat the oven to 375 F.
- Heat a large pan over medium heat and add the butter or coconut oil. Once the fat is hot, add the onions. You want to cook the onions slowly over medium to low heat. They don’t need to be completely caramelized (they don’t need to be extra dark), but you do want them to be nicely browned.
- Add the sage to the skillet and cook for a minute or two longer to allow the flavor of the sage to release. Remove the onions from heat.
- Dump the cubed muffins into a large bowl and add the onions and sage. Mix to combine everything well.
- In a separate bowl, break the egg, add the coconut milk and the chicken broth. Whisk everything to combine. If you want the stuffing to be super duper moist, you can add another 2 tbsp. Of coconut milk and another 2 tbsp. of chicken broth.
- Season the egg mixture with salt and pepper (I added ½ tsp. of pink Himalayan Sea Salt and it was perfect). Whisk the mixture again to combine everything.
- Pour the egg mixture over the corn muffins, onions and sage. Stir to combine. You want all the pieces to be moist.
- You can add the stuffing to the cavity of a turkey or you can add it to a buttered (or coconut oiled) baking dish and bake at 375 F for for about 30 minutes. You may need to add 5 to 10 more minutes if you added extra liquid in step 5.
Notes
This will be devoured. Enjoy the stuffing and the praises of your family and friends that LOVE it!

Easy, Gluten Free Corn Muffins
Ingredients
- ¾ cup organic cornmeal
- 1 ¼ cups your favorite gluten-free baking flour
- 1 tbsp. baking powder
- ½ cup coconut palm sugar
- 1 tsp. sea salt
- 2 eggs
- ¾ cup coconut milk
- 1 stick of melted butter (cooled)
Instructions
- Preheat your oven to 350 F.
- You can use paper muffin liners in your muffin pan. What I do is lightly grease a stoneware muffin pan with grassfed butter.
- Whisk together the cornmeal, gluten-free flour, baking powder, sugar and salt in a large bowl.
- In another bowl, whisk together the eggs, coconut milk and butter.
- Add the liquid ingredients to the dry and stir until just blended. You don’t want to overmix.
- Spoon the batter directly into the muffin pan (or into the paper liners).
- Bake for 20 to 23 minutes. Cool and serve. Enjoy!
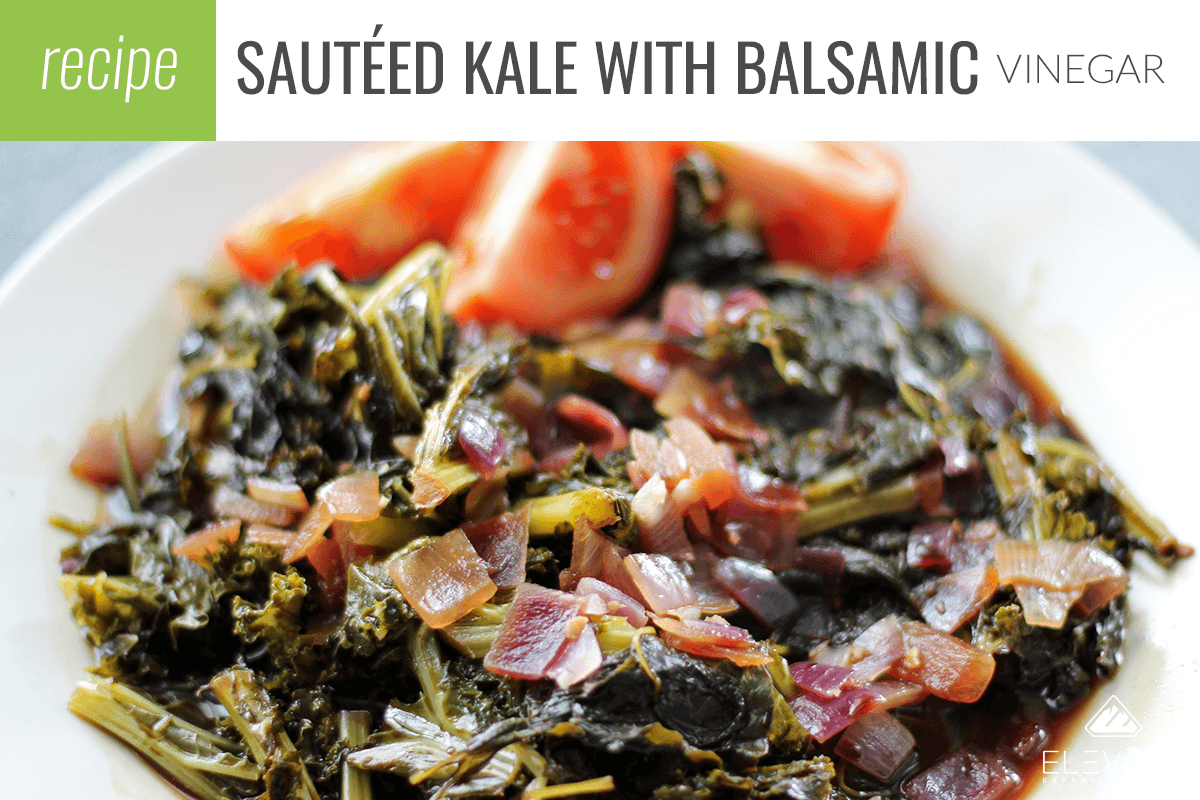
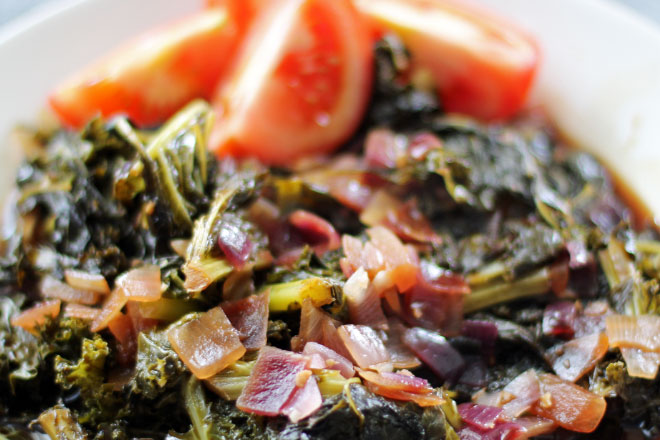
Sautéed Kale with Balsamic Vinegar
- Yield: 4 - 6 1x
Ingredients
- 2–3 tbsp olive oil (or as needed)
- 1 red onion (chopped)
- 3 to 4 garlic cloves (minced)
- 16 cups of kale (roughly chopped (this is about 2 smaller bunches))
- Sea Salt and pepper to taste
- ¼ cup balsamic vinegar (plus more for garnish)
- 1 cup of beef or chicken broth
- 2 Roma tomatoes or tomatoes on the vine (sliced into wedges (optional))
Instructions
- Heat 2 to 3 tablespoons of olive oil over medium heat. Once hot add the onion and sauté until soft, but not translucent.
- Add the garlic and sauté for 1 minute until fragrant.
- Add the kale and sauté with the garlic and onion, coating the leaves with oil as you stir. Feel free to add more oil if you need to prevent things from sticking. Season the kale with salt and pepper to taste.
- Add the balsamic vinegar and continue to sauté, coating the leaves with the balsamic.
- Add the broth, cover and let simmer for 5 to 7 minutes until the leaves are very soft and wilted.
- Remove the pan from heat and drizzle the kale with more balsamic vinegar, tossing to cover the leaves.
- Serve with tomato wedges if you like.
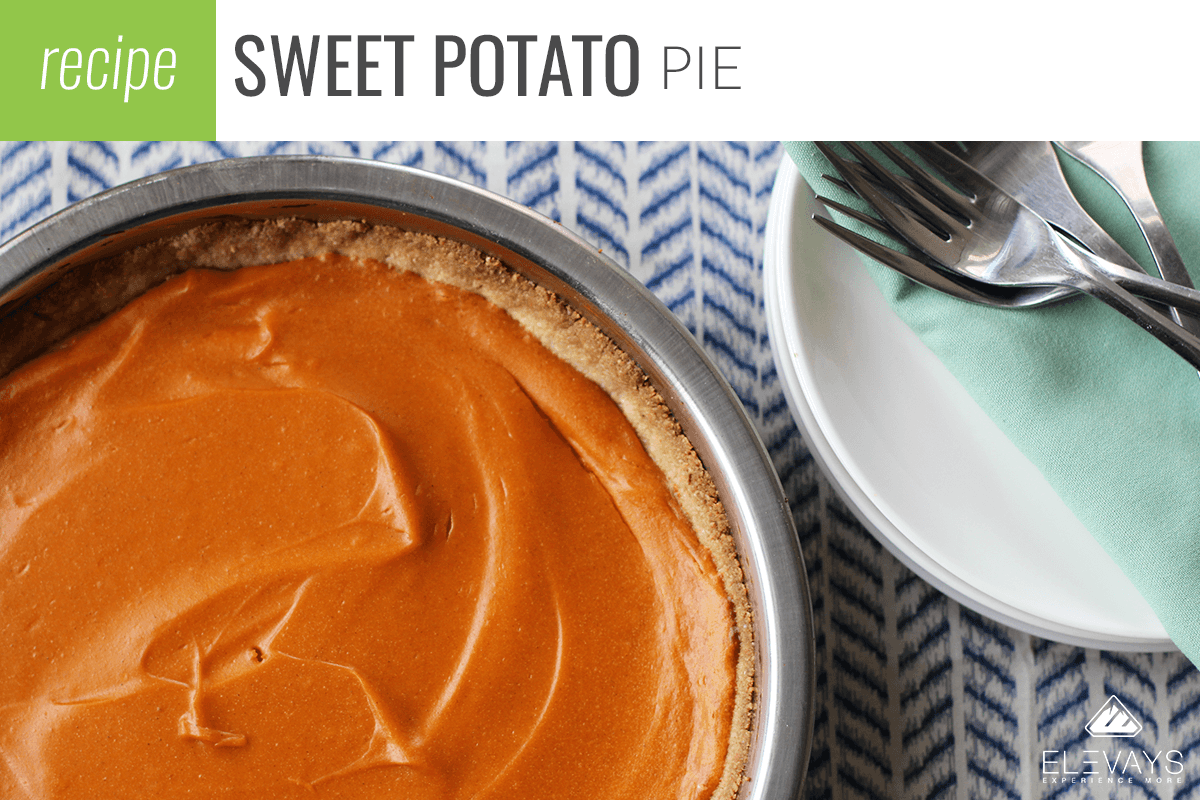
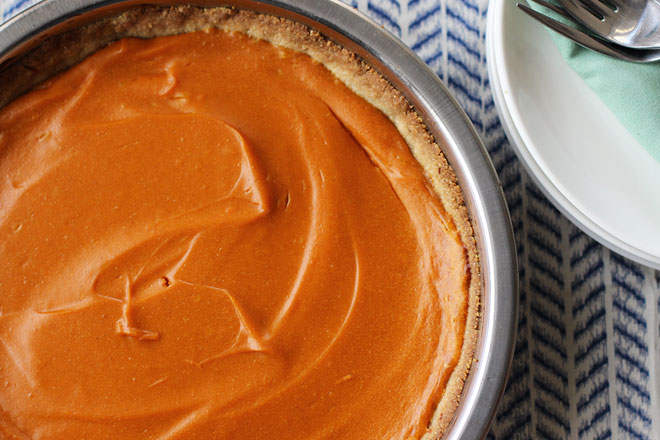
Homemade Sweet Potato Pie
Ingredients
Pie Filling
- 2 cups of sweet potatoes (roasted and peeled)
- 1/4 cup maple syrup
- 1/4 honey
- ½ stick of melted butter (if you’re mixing in a high powered blender like a Vitamix there’s no need to melt it)
- 2 eggs
- 1 tsp. vanilla extract
- ¼ tsp salt
- ½ tsp cinnamon
- ¼ tsp ground ginger
- 1 tsp lemon juice
Instructions
Crust
- If you don’t want to make the crust, just use a gluten-free crust of your choice. That’s what I almost always do.
Pie
- Roast your sweet potatoes at 350* F until soft and tender. Roasting is important to bring out the flavor.
- Make your pie crust according to package instructions or bake if you’re using a recipe. If you’re using a frozen crust, there’s usually no additional steps. You’ll just pour the filling right in.
- Add all of the pie filling ingredients to a Vitamix, high powered blender or food processor. Blend until completely smooth, using the tamper to scrape the sides of the blender jar as needed.
- Pour the mixture into the pie crust (let the crust cool first if you baked yours) and place in the oven.
- Bake for 40 to 45 minutes at 350* F or until a toothpick inserted into the center comes out clean.


DAIRY is an imflamatory food for most people in AIP and the rest of Auto Immune world and is not included in the diet.
You are absolutely right Barbara, dairy for AIP is usually inflammatory. Grassfed Ghee sometimes works well as it removes the milk fats and proteins, but when on the AIP (especially for elimination) it’s best to avoid entirely. Not all of the recipes on this page are written for AIP though. I have adjusted mine (turkey legs and yams) to reflect a butter free option for those on strict AIP (thank you for inspiring that), but Stephanie’s recipes are the ones that are strictly written for AIP and contain no dairy (the AIP Stuffing, Cranberry Sauce & Apple Crisp). The rest are paleo & gluten free. Thank you so much for your input!
Thanks for specifying